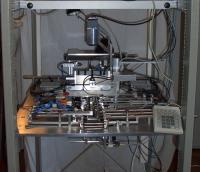
 Automated
Valve Guide Inserts Inspection Machine VFG1
Automated
Valve Guide Inserts Inspection Machine VFG1short description
 Automated
Valve Guide Inserts Inspection Machine VFG1
short description
General
Parts input on the left side of the machine
Cycle time : depends on the size, about 3sec./part
Easy change over with a single point of dimensional adjustment based on
master part
Change over with trained personal within 5 minutes including calibration
Automatic calibration during operation
Valve Guide Insert outer diameter: 8 - 20mm, accuracy approx.
0.001mm
Valve Guide Insert inner diameter: 8 - 12mm, accuracy approx. 0.001mm
Valve Guide Insert length: 35 - 145mm, accuracy approx. 0.005mm
Laser : visible, red
Camera : 7500 pixel CCD line
Cameras: 3pcs. CCD cameras with LED illumination
Computer controlled illumination
Camera resolution : 0.1mm
Computer processed video data and real time display of detected errors
and their dimensions on the monitor
Programable reject error sizes for each zone
Eddy current inspection with sensors for the complete outer and
inner surface excluding grooves
3D data evaluation for detecting longitudinal and circular cracks
Outer surface sensor is adjusted automatically with machine change over
procedure
Outputs
One active O.K. parts output to rhe right of the machine, parts
leave the machine with the same orientation
Two active reject outputs to the right of the machine, user programmable
One passive reject outputs to the front of the machine
Electronics
Modular setup, 19" rack
Power supply : 100-240V, 50-60Hz, approx. 300W
Computer
Housing : 19" on slides
Color TFT monitor
Numerical keypad
Housing
Dimensions : 800x900x2000mm (WxDxH)
Weight : approx. 200kg
Glass doors at front and backside, removeable side walls of
steel
Mechanics
Movements by linear motion guides, bearings and pneumatic actu
Air 6bar, minimal consumption
Easy exchangeable maintenance-free parts
Network
Connection for a computer network used for diagnostics, remote
administration and statistics